Last time I gave y’all a thorough
review of
6 different kintsugi methods
you can choose from based on the needs of your pot-mending situation. After completing this review, out of respect for my current situation as a
graduate student with limited time and funds, I opted to try one of the
simplest methods - the
"2-in-1 Step Method: Oozing Colored Epoxy". As I previously described, this method requires the least supplies,
hands-on steps, and wait time while providing a durable end product. Because
this method had concerns regarding control of the aesthetic quality, my next question was whether these limitations could be improved upon. Hence, today's article covers several trial pots I repaired with this method to observe
and tweak the 2-in-1 Step technique. My results from the final pot I repaired (see below) advance the 2-in-1
Step Method as it demonstrates the ability to use this method to cleanly
fill large missing pieces in some circumstances, which has not previously
been reported. Combined with the careful application of the colored epoxy, this technique
may now be closer to the quality associated with the more complicated kintsugi repair techniques.

|
The result of my final kintsugi repair using the 2-in-1 Step Method:
Oozing Colored Epoxy.
This piece had a large missing piece and some
small gaps from smaller missing pieces which made it extra challenging
for this technique.
|
Sections
-
Kintsugi Methods (Last time)
-
Traditional Kintsugi Using Natural Products
-
Quick 2 Step: Superglue & Oil Sharpie
-
2-in-1 Step: Oozing Colored Epoxy
-
3 Step: Epoxy Mend, Scrape, & Paint
-
4 Step: Epoxy Mend, Scrape, Lacquer, & Gild
-
Professional 5 Step: Mend, Scrape, Lacquer, & Gild
-
Protocol Summary Table
-
Or... just leave the pot broken!
-
Refining the 2-in-1 Step Method (This time)
-
First Attempt - Silver Show Pot
-
Gold-Repaired Mug
-
Gold Tropical Pot - Blending Unevenness
-
Mini Gold Challenge Pot - Fine Lines, Gaps, and Missing
Pieces.
-
Final Refined Protocol - 2-in-1 Step Method: Oozing Colored
Epoxy
-
Blog Announcements
-
References
IA.2 Traditional Kintsugi Update
Before I dive into the main subject
of this week’s article, let me first note that I have gone back to
my first kintsugi article to expand the section on the
traditional kintsugi method. I previously wrote about the traditional Japanese method involving
natural products for ceramic repair as only a thing of the past, but
surprisingly, an artist living in Italy has proven me wrong. Although the
materials for traditional Japanese Urushi lacquer are hard to come by in
the west, Thom Rozendaal recently experimented with recreating this
natural product with resin from other tree species and a lacquer produced
from insects. My full summary of Thom’s methods, materials, pros, and cons
are available in
my previous article here and you can read more about it directly from
Thom’s art blog here.
Thanks for reaching out, Thom!

|
|
Artist Thom Rozendaal's finished kintsugi repair using only
natural products that were available to him. Read more
here. Source.
|
III. Refining the 2-in-1 Step Method
As I said, I chose to use this
method for my first kintsugi repairs because it is the most efficient
method in terms of time and cost. Here I share several pots I repaired
with this method to see what degree the quality of the final result
could be controlled and to what extent the aesthetic finish
predetermined to random unevenness.
III-I. First Attempt - Silver Show Pot
First, I had a pot that my housemate accidentally knocked down last
winter and needed to be repaired ASAP for my entry into the
2021 Columbus Bonsai Society’s Annual Show
(the first one I’ve participated in with my new club, and likely the
subject of a future blog post). Below are the pictures from this first
attempt. The reason I mended this pot with silver will become apparent
when I share the final tree with y’all in the future. Those who were in
attendance may remember it though. 😉
Since my inner demons include a voice telling me to
procrastinate, my objective with this first pot was to create a solid
and lasting repair using supplies I could find from local art and
hardware stores rather than wait for products to be shipped online. The
supplies I gathered are pictured below. I'll expand on their purposes a
bit here; these basic materials were used for all pots repaired in this
article.
Materials
-
Clear-drying epoxy - To repair the pot and contain our pigment
highlight. Based on my previous article, I would have preferred to
use PC-Clear as it was reported as the most durable. I could not
find it though, so I took a gamble on the Gorilla Glue Clear-Drying
Epoxy.
-
Silver pigment powder - To highlight our crack repair (can substitute
real silver or other metals).
-
Inexpensive brush - I thought I would use this for applying epoxy but
I did not. You don't need it and it would be a waste given you will
need a fresh brush each time the epoxy hardens.
-
Toothpicks - the ideal disposable tool for mixing small volumes of
epoxy, pigment powder, and applying small volumes at a time to the
crack repair.
-
70% Ethanol (or higher) - This was intended to be used with the rag
to remove excess epoxy, but I did not find it very helpful. In some
cases it was used, but the rag is a blunt instrument. I preferred to
smooth out any excess with a toothpick.
- Inexpensive rag - see above
-
Parchment paper (not pictured) - This was the surface I mixed my
epoxy and powder on for easy cleanup.
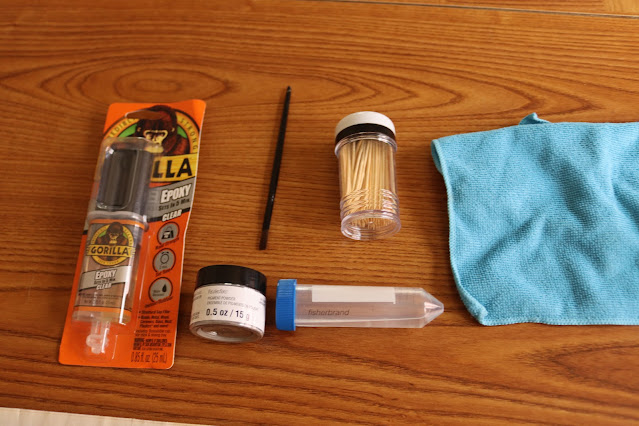
|
|
Supplies from left to right: Gorilla brand clear epoxy, silver pigment
powder, disposable brush, toothpicks, 70% ethanol, inexpensive rag,
and parchment paper (not pictured).
|

|
|
When life gives you lemons... you intensely review a 400-year-old
Japanese technique and use it to write two excessively long articles
about your lemonade, duhhh.
|
Above you can see how many pieces I had to repair. Luckily
this pot mostly had larger pieces which made the process easier, but it
still took about 1 week to repair the pot in its entirety. Only one or two pieces could be mended at a time, then the pot would have to
be allowed to sit for a day while the epoxy cured.
Below you can see my only shot of the pot repair in
progress. Epoxy was mixed with a toothpick-scoop full of pigment powder
until the desired color was reached. This glue mix was then quickly
applied to the pot as the Gorilla Glue sets in about 5-10 minutes. The
epoxy is easy to apply at first but over time it gets stringy when it gets
close to solidifying. When the epoxy is at this stringy texture, it's a
good time to stop applying and mix a new batch as using epoxy in the
stringy period can become messy and result in epoxy accidentally getting
dragged onto places you didn't intend.

|
|
Here you can see the colored epoxy that has been pushed out of the
crack when these two pieces were first joined. The epoxy appears much
more liquid initially (as in this picture) early on in the setting
process.
|
I wish I had taken more pictures while in the progress of
making the first repaired pot, but alas, my hands were full pressing the
pot back together. With this brand of glue, you should firmly press the
two pieces together for several minutes while the epoxy starts to
harden. More in-progress pictures and pointers will be shared in
subsequent pot repairs detailed later in this article. For now, enjoy
the finished product of this first pot through the pictures below.

|
| Front |

|
| Back |

|
|
Rotated slightly from above.
|
In this first
pot repair, you can see the issues I predicted in the previous article did
manifest somewhat. The lines for this technique certainly can come out uneven
and drips are sometimes apparent due to gravity pulling the oozed epoxy
downwards. For those who are fans of wabi-sabi or the idea of embracing
imperfection, maybe the natural tendencies of this technique are sufficient
for you, and no further adjustments are needed. However, subsequent trials
with this kintsugi technique will see how much this method can be further
refined.
III-II. Gold-Repaired Mug
Next up, a mug that was broken during shipping when I
forgot it in Seattle. Another good chance to practice. This time I tried
using gold pigment powder and took a few more process photos to show the
mixing of the epoxy and how you apply it with the toothpick. I'll let the
pictures and captions tell the story on this one.
*Note: I don't expect this mug will be food-safe after applying the epoxy
because who knows (not me) what the chemicals in the epoxy and pigment
powder would do in the body? This will be a decorative-only piece from now
on.

|
|
Several large broken pieces.
|

|
|
Add the gold powder until the epoxy mix is the color you desire.
|
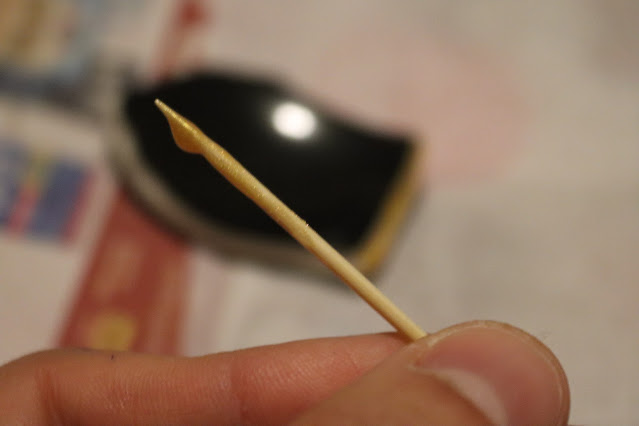
|
|
Scoop a bit of epoxy mix with the tip of your toothpick. After
scooping, you may want to direct the tip downwards so the drop
accumulates and is easier to apply in a controlled way to your
surface.
|

|
|
On another mug that just had a broken handle, you can see that you
need to apply more epoxy if the area of the break is larger. This
ensures a durable mend.
|
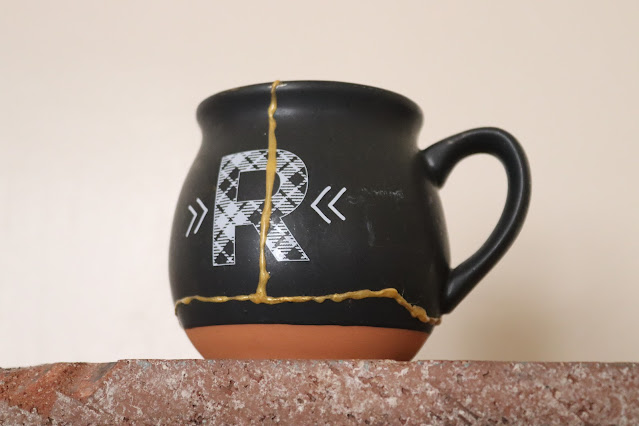
|
|
Front. This mug was another instance of getting used to how the epoxy
behaves. You can see, it is very easy to place too much epoxy on the
crack and get a large and often uneven line.
|
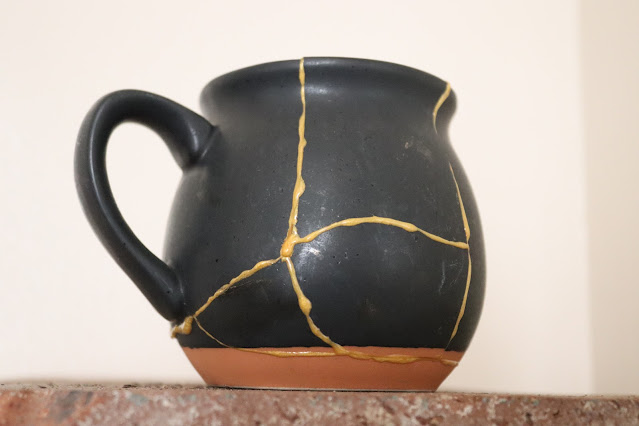
|
| Back. |
III-III. Tropical Pot - Mending and Blending Unevenness
Next up, a tropical pot with two minor
broken pieces around the lip. I don't even remember where this pot came
from or how it broke but I found it in my ceramics collection and
thought "Oh good, another test subject!" This pot is inexpensive,
mass-produced, and the quality is not durable to frosts so under normal
circumstances this is the kind of pot that may not be worth investing a
significant amount of time and money into using more advanced kintsugi
techniques with more expensive ingredients. However, by using the
inexpensive and relatively quick 2-in-1 Step Method on this pot, we can
get more life out of it yet.

|
|
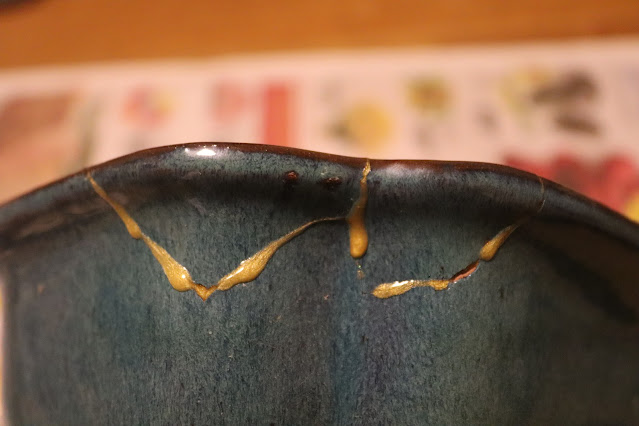
With the flash, this pot takes on a vibrant light blue color.
Under normal lighting though, it is more of a dark blue. I'll show
some pictures both ways throughout. Here you see the two chipped
pieces.
|
|
|
My strategy for this pot was to be more cautious with my
application of epoxy. A little goes a long way, so I first applied
just a light coat and let that set in. You can see that still
resulted in oozing in some areas which dripped together, but in
other areas, the thin layer of epoxy left gaps.
|

|
|
The same trend of drips and gaps is also seen on the inside. Also
on the rim where the crack was very thin, no epoxy was visible on
the outside there even though a solid mend formed.
|

|
|
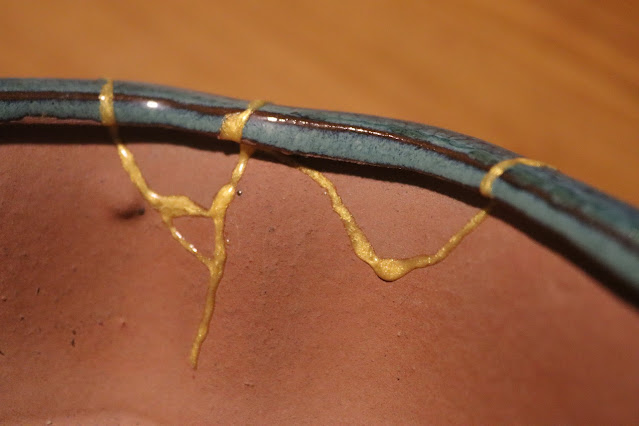
The previously described uneven areas, gaps, and areas where the
epoxy was not visible despite the crack were fixed by applying a
second coat of epoxy. A thin line was applied on the cracks on the
rim where the epoxy should have been visible and a thicker amount
was applied to gaps and areas where uneven drips had to be blended
together to form a smoother line. Thou can also see a new line
going downwards which covers a crack I noticed after the
fact.
|
|
|
Mended and blended interior.
|

|
|
Finished front view.
|

|
|
Finished corner view.
|
III-IV. Mini Challenge Pot - Fine Lines, Gaps, and Missing
Pieces
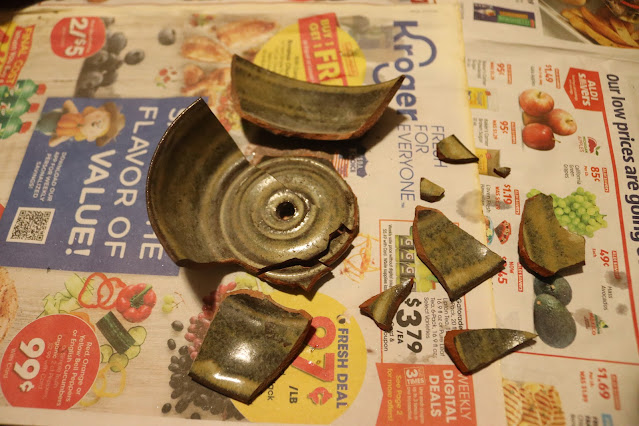
Lastly, we have my mini
pot. This pot originated from my former housemate in Seattle. Joey was getting back
into making ceramics so I paid him to make a couple of kusamono-sized
pots. Unfortunately, this one shattered when it was shipped to me after
my move. A year and some change later, time to fix it. As I went along,
I realized that this pot was so thoroughly broken that some areas had tiny pieces to
place back together, some areas had large missing pieces, and other
areas had large gaps where the crack was somehow widened. In total,
these factors made repairing this tiny pot take 2 weeks of on and off
work, but it taught me more than all the other pots combined as the
challenges of this tiny pot required me to try new strategies to get a
consistent-looking product. I would glue a bit one day, let it rest.
Blend some lines one day, let it rest. In some areas, I even scraped
excess epoxy off with a knife in the hours after the epoxy set (while
the epoxy was soft, yet solid), or scraped off finer inconsistencies
after some areas had fully hardened. The work was worthwhile, but now I
have to think of what tree or accent plant would pair with this pot!
It's too nice not to use it.
|
|
Look at all those pieces! I've roughly arranged them by how they
need to go together, then the ones to the right I had no idea
where they went yet.
|

|
|
I was applying the same strategy as the last pot but using even
less epoxy to try to get fine lines. I would first repair the
pieces together and then go over the cracklines again where
necessary.
|

|
|
3 pieces are now stuck back together.
|

|
|
And a fourth! Again, the area with a less than complete hiding of
the crack will be revised later.
|
|
|
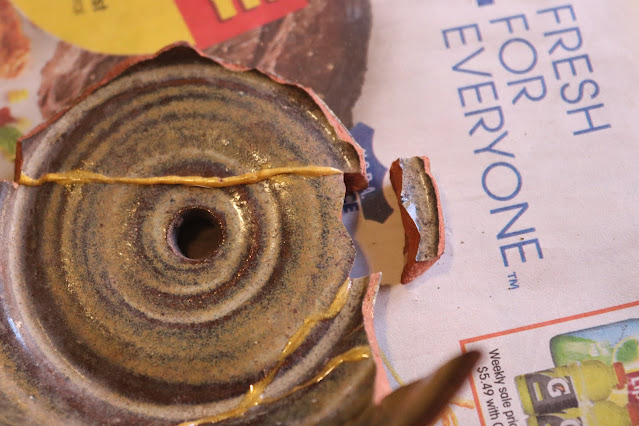
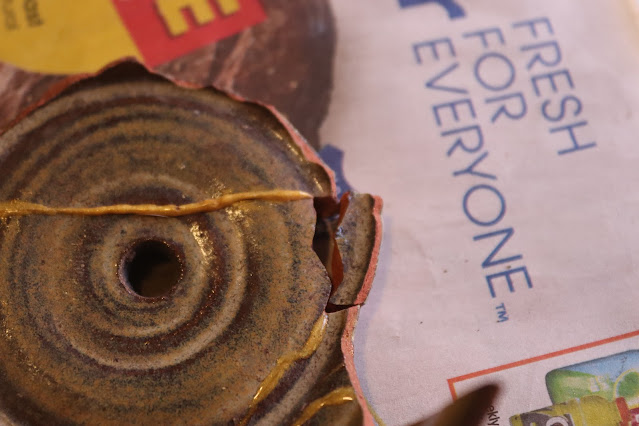
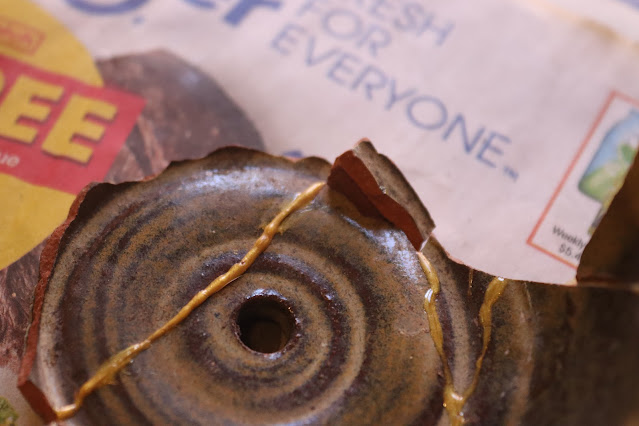
Around here I realized what happens if you're not careful about
the order that you put the pieces back together. Although this
piece would go there, it could not be placed in due to the top
piece blocking its entry.
|
|
| Doesn't fit. |
|
| Doesn't fit. |
|
|
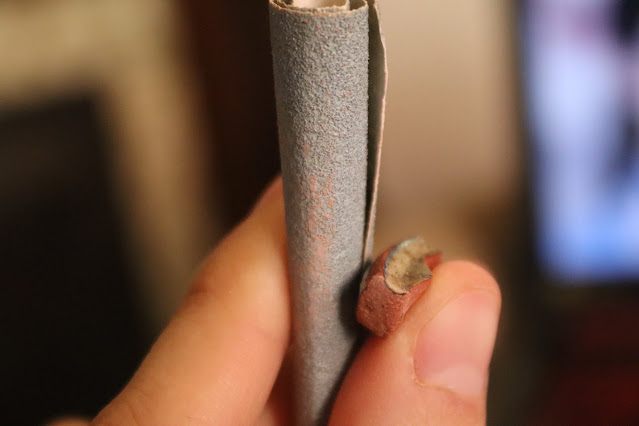
Solution! Sand down the edges so that it can squeeze in. This
slowed me down a bit. Better to avoid it.
|
|
|
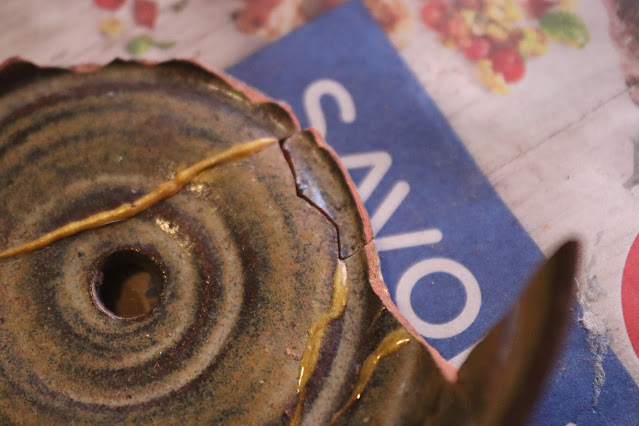
Finally fits!
|
|
|
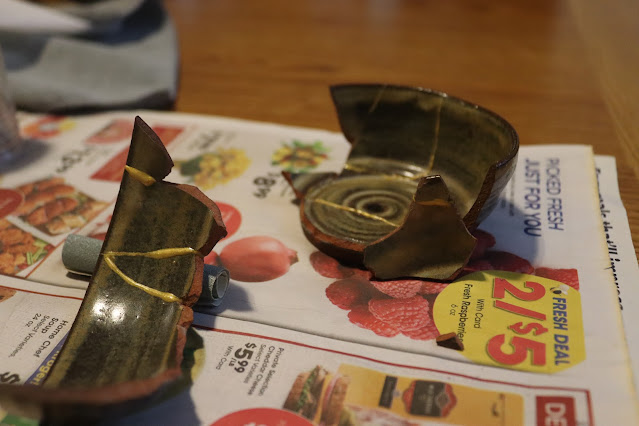
I glued the two halves together simultaneously to save time.
|
|
|
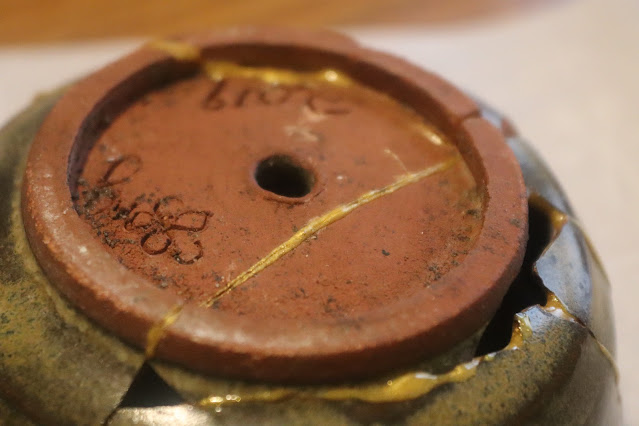
Then when the two halves were put back together and there were no
more pieces, I realized I was missing some pieces. Couldn't find
them anywhere, so we will have to get creative.
|
|
|
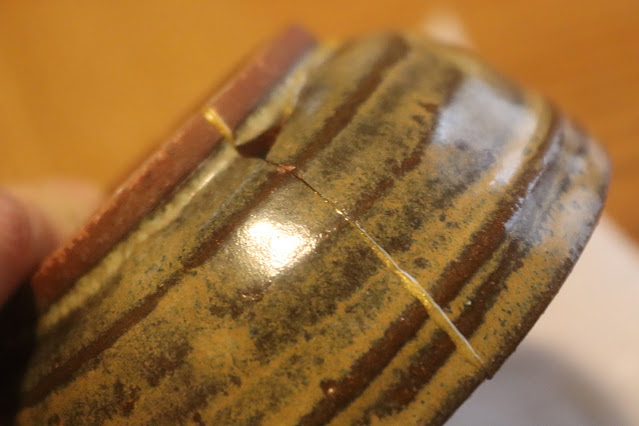
Small missing piece and a crack that needs another coat.
|

|
|
More gaps were revealed.
|

|
|
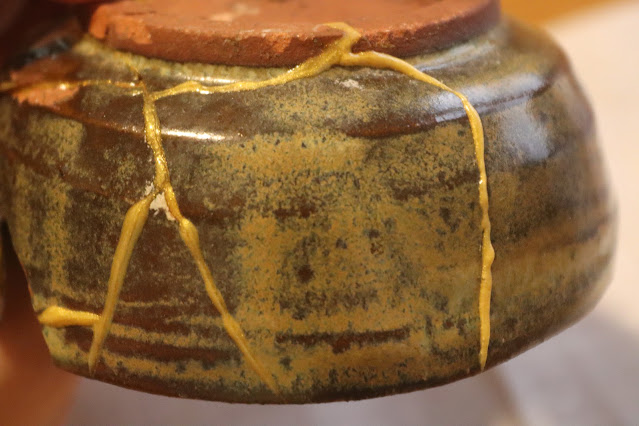
This area had one large missing piece in addition to the large
cracks.
|
|
|
This area turned out pretty well at least. Only minimal blending
is needed.
|

|
|
Here you see the inside view of those gaps, cracks, and missing
pieces. A second coat is needed for many parts.
|

|
|
Inside view of some missing pieces.
|

|
|
My solution to the missing pieces was to cover them with clear
scotch tape on one side. I would then use this to create a smooth
finish on the exterior and drop in the colored epoxy from the
interior.
|

|
|
A few layers of tape to ensure a good surface to apply epoxy on.
|

|
|
Exterior of large missing piece with the tape solution.
|

|
|
Interior of small missing pieces ready to receive the epoxy.
|

|
|
Same solution to the large missing piece from the interior.
|

|
|
For the large missing piece on the rim, I also taped it over the
top to try to ensure the rim of this piece would be relatively
flat with the rest of the pot rim.
|

|
|
Since the inside does not have the tape to create a smooth
surface, the epoxy must be applied with the missing piece resting
down. Gravity will ensure the epoxy I apply spreads evenly and
dries smoothly rather than dripping downwards.
|

|
|
Piece repair is cooking! Since one side was not sealed, I could
feel when the epoxy had hardened and when the tape was therefore
ready to be removed.
|

|
|
After many pieces placed back together and many touch-ups to
perfect and blend the lines, this is the graveyard of toothpicks
from this one tiny pot.
|

|
|
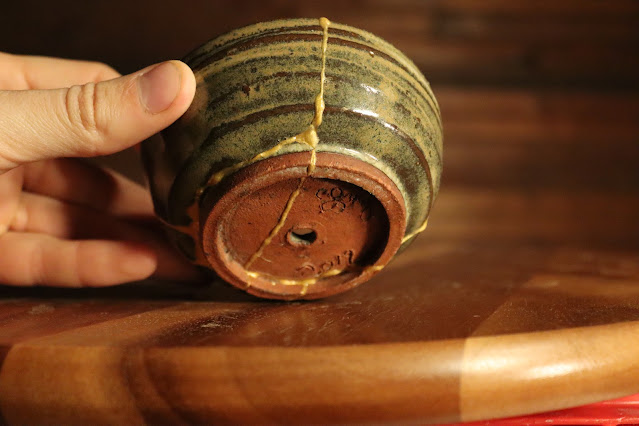
Finished bottom + front.
|
|
|
Finished bottom + back.
|

|
|
Finished inside.
|

|
|
Finished front.
|
III-V. Final Refined Protocol - 2-in-1 Step Method: Oozing Colored
Epoxy
This article is now quite long so I'll only briefly go
over the final protocol with the lessons from the above trials.
Updated Methods:
-
Mix epoxy with pigment powder of choice to reach the desired color.
-
Pick up a drop of epoxy mix with the toothpick, and spread over the
crack such that only a small amount is present on the crack.
-
Using a small amount will enable greater consistency of the line
appearance.
-
Allow pieces to be set fully before building further. Be careful of
the order in which you add pieces so entry of the next piece is not
obstructed.
- If a piece is blocked from entry, sand edges until it fits.
-
If a piece is missing, build a scaffold by applying clear scotch
tape across the gap on the exterior.
-
Arrange the pot so that the taped area rests parallel to the
ground. Gravity will aid in spreading the epoxy evenly on the
interior at the site of the missing piece.
-
Apply the epoxy mix to the inside of the pot until it fills the
void.
-
Apply a very fine (as needed) second coat of colored epoxy over
areas that have gaps, which do not completely hide the crack lines,
or around regions with uneven drops of epoxy from the first
application.
- Scrape excess epoxy off.
-
If a large excess of epoxy is applied in an undesirable location,
it can be easily removed in the first hours while it is still
malleable (before fully drying) with a metal implement.
-
If the epoxy is applied while too tacky, small strings of colored
epoxy may come off with the toothpick after application. These
sloppy strings can land off the line of the crack repair. For pots
with smooth glazes, these small strings can be carefully scraped
off after drying with an Exacto knife, paring knife, or butter
knife.
Materials:
- Clear epoxy
-
PC Clear is preferred for durability, but as discussed last week,
Alardite is slower to set and JB ClearWeld or Gorilla Glue Clear
(among others) may also work.
- Gold/silver powder / mica powder / pigment powder
- Parchment Paper
- Toothpick
- butter knife/paring knife/ Exacto knife
- Scotch Tape
IV. Blog Announcements
-
Now is a perfect time to start preparing to cold-stratify
seeds for them to germinate in spring, so check out my new seed stock for 2022! As always,
all sales come with my 10-Year Bonsai From Seed Guide. These
could be a perfect stocking stuffer for your plant-curious
friends or family members. See my Sales Page for more details on my offerings.
-
Check out my Before & After Portfolio! I've added some new gifs of work that I had done during my
apprenticeship at Elandan Gardens, on my trees, and for past
clients.
-
The Columbus Bonsai Society has a new website! If you're in the area, join us at our next meeting on
January 16th where we will go over what to do if you receive
your first bonsai for Christmas as well as tool maintenance
and sharpening.
More info here.


Thank you! Solved a multitude of problems.
ReplyDeleteHappy to help!
DeleteThank you so much for this. Yesterday I made my first kintsugi attempt, to repair a broken mug that was cracked. I had to break it and reassemble it. I had bought a kintsugi kit from Amazon and it came with no instructions. I made the mistake of trying to glue all the pieces together at once, and of course it kept falling apart (and giving me a small cut in the process!) and the result was a total mess, with gold epoxy all over the mug. I thought all was lost, but today I returned to it and spent some time scraping the mess off with a small metal implement which has worked well. The repaired joins are very thin and not too noticeable. Having read your article, I now know that I can go over it again with a toothpick this time, and I should get a better result. The inside isn't too bad but the lines are rather thick - I'm not too worried about that because they won't be too visible, and I am not going to be using the mug for drinking out of from now on. I think the result is going to be OK in the end, thanks to your fantastic detailed instructions! Thank you!
ReplyDeleteGlad it was useful to you and you could do it!
Delete